Sunday, 25 March 2012

Melting Moments

Melting Moments
Ok so I made these on a Saturday (last Saturday!!!) with all intentions of taking them to work...unfortunately for the legal departments they didn't even last all of Sunday!

I've made Yo-Yo's before which are very similar to Melting Moments, but had never attempted these before.  The main difference between these two shortbread-type biscuits is that Melting Moments do not have custard powder in the shortbread.  I found this recipe to also result in a much softer biscuit than when I made the Yo-Yo's...

When I first looked at the recipe I was just going to follow the method as it was written but when I saw it read "place the flour in a medium bowl...then add everything else" my instincts told me something was wrong.  All bakers know that when you have egg, butter, sugar and flour -- flour is the NEVER the first thing to go in!  So I followed my gut feeling and whipped the butter and sugar together till it was fluffy then added in the egg and went from there.  I ended up with such a soft, crumbly and fluffy biscuit and was glad I didn't follow the recipe! (although sometimes this isn't always the smartest idea, like if you're making macaroons!!! lol)


The cream for the middle was so to die for, it had just the right amount of lemon juice and rind...I had to stop myself from eating it straight out of the bowl -- which got increasingly harder as the time passed waiting for the biscuits to cool.  I learnt the hard way when I made Yo-Yo's that you really can't be inpatient when you're icing them, because if you try to sandwich butter cream between hot or even slightly warm biscuits it is going to melt and make your bikkies soggy!!!! so DO NOT do it!!!!!

Melting Moments


Ingredients:

Biscuits
  • 250g butter
  • ½ cup (80g) icing sugar mixture
  • 1 teaspoon vanilla extract
  • 1½ cups (225g) plain flour, sifted
  • ½ cup (75g) cornflour, sifted
Butter cream
  • 80g butter
  • 2/3 cup (110g) icing sugar mixture
  • 1 teaspoon finely grated lemon rind
  • 1 teaspoon lemon juice 


Method:

  1. Preheat oven to 180⁰ and line baking trays with baking paper and non-stick spray.
  2. Beat the butter and sugar together in a medium bowl.
  3. Add the vanilla extract and the sifted flours.
  4. Spoon small dollops of the mixture onto the baking trays, then press down lightly with a fork.
  5. To make the butter cream, beat the butter and icing sugar together, lemon rind and lemon juice together.
  6. Once the biscuits have cooled completely choose two that are of similar size and spoon a decent dollop of cream onto one.
  7. Lightly press the other biscuit on top and sit aside to set.
  8. Great with a cup of tea!!!! (and extra cream!)

Love in Baking, Passionate Baker! 2:D 

Saturday, 10 March 2012

Pancake Manor

I had a friend from Mackay come stay for the weekend and among the many fun and exciting things we did (some of which I hadn’t even done in Brisbane yet!!!) we went to the Pancake Manor.  It was Brodie’s idea, and it just so happened to be one of the BEST ideas he had ever had!

Early Saturday morning, after Brodie, my mum, my brother Jarrod and I drove in circles around the one way streets of the Brisbane CBD for 20 minutes, we finally found a park (in a loading zone).  As we walked into the doors under the ‘Pancake Manor’ sign we found ourselves inside what appeared to be an old church.  The ceiling seemed to go for miles, large timber banisters rose to a peak in the centre of the enormous room.  There were old-style chandeliers hanging everywhere with large polished wooden tables and wooden booths.  In the centre of the room was the bar, which had more timber edging and stained glass panes than you can imagine.  Basically, the atmosphere was amazing, all before we’d even sat down.

As the four of us sat in our booth and opened our menus you could see the excitement in each of our eyes.  Majority of the menu items had photos along side them, the dessert choices especially!  Whilst the Pancake Manor also has savory crepes, main meals such as steak and chicken, our main desire in coming here was to get one of their famous pancake dessert stacks.

Strawberry Patch:

Strawberry Patch
As per usual, I was completely indecisive and was only able to come to a decision on the grounds that mum shared some of hers with me in exchange for some of mine.  So I ended up ordering the Stawberry Patch which consisted of 2 fluffy buttermilk pancakes, strawberry coulis, a generous dollop of fresh cream and a scoop of ice-cream to top it all off.

The strawberries were so fresh, with an amazing flavour.  The way they had been sautéed left an amazing syrup, but I do have to say that it did need a little more on the syrup side as it ran out a little too fast.  Next time I’d probably get a sauce or syrup on the side I think. 

Bananarama:

Mum opted for the Bananrama (I think that’s what it was called).  In hindsight I probably should have gone for this option, as I’m a huge fan of Banana and butterscotch sauce, but as mum and Brodie were ordering this one I felt like one of us should get something different.

Bananarama
The Banarama consisted of 2 fluffy buttermilk pancakes, 2 whole (might I say of generous size!) bananas split lengthways then grilled to perfection, a homemade butterscotch sauce, a generous dollop of cream and then a scoop of ice-cream of top.  I think all the pancakes were also sprinkled with icing sugar, for that final touch.

Brodie also got the Bananarama but despite his ‘manliness’ he was unable to finish even half!  Mum and I were the true winners of the day!

I ended up trading half of mine for half of mum’s, the bananas were to die for and the butterscotch sauce so creamy, the perfect consistency and flavour.  It was just to die for!  Next time I think I’d probably order the Bananarama and then add a serving of strawberries or strawberry coulis to it.  That would make the whole meal just perfect!

Pancake Stack:

Pancake Stack
My youngest brother Jarrod likes his food a little more simple than the rest of us so he went for a two stack with good old whipped butter and maple syrup.  His also came with cream and ice-cream but he was happy with just the whipped butter and the syrup.  Probably not such a bad thing when you think about calories!!!

I was able to con him into giving me a drizzle of the maple syrup, and I have to say that it was probably the best maple syrup I’ve ever had!  The Pancake Manor sure doesn’t lack quality with their ingredients in any regard.  His didn’t last very long though, it was gobbled up in minutes. The prices weren’t too bad for the meals either…Most of the pancake desserts (which were the ones that came with all the extras and fancy things) ranged from $12-14.  

We enjoyed the experience so much that we’ve booked to have my other brothers 18th dinner there at the end of March.  Can’t wait to see what everyone orders that night!

Remnants of a Strawberry Patch
Love in Baking, Passionate Baker! 2:D

Friday, 9 March 2012

Butterfly Cakes

Butterfly Cake
I had a request from my new team leader in the legal department I’m working in for butterfly cakes.  To be honest, I’ve never made them before, which is a bit strange considering I absolutely love anything with jam and fresh fluffy cream!  

These were so good…not as heavy or sickly sweet as some of the caramel, chocolate and toffee things I’ve made, which was a nice change.  Goes down well with a cup of tea.

I’m a fiend for having a lot of jam with my cream…so I put extra jam on the ones I knew I was going to eat, but it’s really your own preference how much or how little you want.  

When I took them into work it was great to see that as people bit into them, they discovered a jam surprise on the inside.  Some even used that phrase!!!  The wings were the best part, scooping up the jam and cream….droooool…

Definitely worth a try if you like light, fluffy, jam and cream!

Butterfly Cakes 
as adapted from Women's Weekly 'Easy Cupcakes by Colour'

Vanilla Butter Cake:

  • 1 cup (150g) sifted SR flour
  • 90g softened butter
  • 1 teaspoon vanilla extract
  • ½ cup (110g) caster sugar
  • 2 eggs
  • 2 Tbsp milk


Method:
  1. Preheat oven to 180⁰ and line a muffin tray with patty/cup cake cases, spraying lightly with non-stick spray.
  2. Beat butter and sugar till light and creamy.
  3. Add one egg at time, mixing well after each addition.
  4. Add the milk and extract.
  5. Gradually add the sifted flour, mixing till combined.  Do not over mix.
  6. Fill each patty case about half way, depending how big you want each to be.
  7. Bake for 10-15 minutes, or until they spring back on the top when touched.  They should have a little bit of colour/browning on top but not too much.
  8. Set the patty cakes onto a cooling tray, cool completely before filling (I cooled over night).


Filling:
  • Strawberry jam
  • 600g thickened cream
  • Caster sugar (to taste)
  • Icing Sugar

Method:
  1. Beat the cream and caster sugar till the cream thickens, and is light and fluffy. 
  2. Add enough sugar to your own taste/sweetness.
  3. Once the cakes have cooled, cut a small round hole in the top about 2-3cm deep in the top of each cake.
  4. Fill the hole with half a spoon of jam and a spoonful of cream (more or less depending on your own taste).
  5. Cut the circle cake cut outs in half then place them into the cream like butterfly wings.
  6. Sift icing sugar over the top of the cakes.

Love in Baking, Passionate Baker! 2:D

Wednesday, 22 February 2012

Banana, Date & Walnut Slice with Lemon Icing

Lemon Icing Running off the Slice

The first time I baked this I took a pasquillion photos of each step of the process…Then the next day when I was all motivated to post it on my blog I went to upload my photos and realised—my dam memory card wasn’t in my camera when I took all the photos!!!! 

The only good thing to come from taking phantom photos was that I got to make this amazing slice/cake AGAIN!  I know I’m probably a little bias but this would have to be one of—not wait, maybe even my actual favourite—thing I’ve ever baked…

To test whether I was just too biased I took the second lot into work with me and the critics loved it!  The massive container I took in came home empty at the end of the day…I even got a few page view out of it!!! =D

But seriously, this slice is amazing…it has more of a cake texture, very moist and fluffy but still has enough depth and denseness to it to make it delicious!  I think the bananas and dates give it most of its moistness and I tended to put in a little extra banana both times I baked it.  I even cheated with the icing and used bottled lemon juice instead of a fresh lemon—you couldn’t even tell!
  
Banana, Date & Walnut Slice with Lemon Icing 
Recipe adapted from ninemsn.com

Ingredients:

The First Piece

  • ½ cup (80g) seeded, coarsely chopped dried dates
  • ¼ cup (60ml) water
  • 1 tblsp golden syrup
  • 90g butter
  • ½ cup of white sugar
  • ¼ cup of brown sugar
  • 1 cup (150g) self-raising flour, sifted
  • ½ tsp ground nutmeg
  • ½ tsp cinnamon
  • ¾ cup (45g) rolled oats
  • 1/3 cup mashed bananas
  • ¾ cup of roughly chopped walnuts


Lemon Icing:

  • 2½ cups (400g) icing sugar (mix of pure & soft)
  • 30g softened butter
  • 2 tablespoons lemon juice
  • 1 tablespoon water, approximately
  • Extra walnuts


Method:

  1. Preheat oven to 180⁰. Spray and line a slice tin with baking paper.
  2. Combine dates, the water and golden syrup in a small saucepan and bring to a boil. Simmer, uncovered, for 2 minutes or until slightly thickened, then cool.
  3. Beat the butter and sugar in a small bowl with an electric mixer until combined. Stir in sifted flour, nutmeg, cinnamon, date mixture, oats, walnuts and banana.
  4. Spread the mixture evenly over the base of the prepared tin.
  5. Bake in a moderate oven for about 30 minutes or until a skewer comes out relatively clean.  You want it to still be a little squishy to the touch.  Cool.


Lemon Icing Method:
  1. Sift the icing sugar into a small heatproof bowl.
  2. Stir in the butter and juice, and enough water to give a stiff paste.
  3. Stir over pan of simmering water until spreadable OR if you’re like me, just chuck it in the microwave for 20 seconds.
  4. Spread the slice with the lemon icing and sprinkle with sprinkle with the extra walnuts.
  5. Eat it while it's still a little warm (if you were inpatient when you put the icing on! hehe)

Love in Baking, Passionate Baker! 2:D


Friday, 3 February 2012

Carrot Cake


Carrot Cake
Ok so I have some awesome news and some bad news...I FINALLY got a digital SLR camera!  The bad news is that I made this Carrot Cake before I bought the camera so the photo quality is still crap...

It tasted good though!  Regardless of how it looked!  I was sitting at home cleaning while mum was out doing groceries when I randomly had a craving to make carrot cake, not because I wanted to eat it just felt like making it...

Although the thought of licking the left overs out of the mixing bowl for both the cake AND the cream cheese frosting may have influenced my decision.  Carrot cake would have to be one of THE BEST cake batters to eat, I almost wish, no I DO WISH, that I’d kept some batter in a container in the fridge hahaha. 

This is a pretty easy recipe, it’s from this recipe book my Aunty made for me and all the women in my family/extended family.  It’s a collation of all of her tried, tested and favourite recipes from baked goods, to Thai noodle salads and decadent desserts.  It really is an amazing book, I’ve cooked and baked so much out of it lately...

Ingredients: 
Ingredients all in one!
  • 1 Cup oil
  • 3 eggs
  • 1 ½ cups raw sugar
  • 2 cups sifted SR flour
  • 1 tsp cinnamon
  • ½ tsp salt
  • 2 cups grated carrot*
  • 1 cup walnuts (semi crushed, extra for decorating)
  • 1 cup drained crushed pineapple** 
Icing: 
  • 125g Philadelphia cream cheese
  • 2 tbsp butter (softened)
  • 1 cup icing sugar
  • ½ tsp vanilla 
Method: 
  1. Preheat oven to 180⁰.
  2. Mix together the oil, eggs and sugar.
  3. Add the SR flour, cinnamon and salt, then the rest of the ingredients.
  4. Pour batter into two round cake tins and bake for approximately 1 hour or until a skewer inserted into the middle comes out clean/crumbly.
  5. Let cool completely before icing.

 Icing: 
  1. Mix all ingredients together.
  2. Place one cake on a serving plate and ice the top of it.
  3. Place the second cake on top then ice the top and sides.
  4. Sprinkle with the extra walnuts. 
* I used a food processor with a grater to grate the carrots.  I’ve done it before by hand and it takes a VERY LONNNNG TIME!
**I also discovered that a tin of strained pineapple gives you not only pineapple for your carrot cake but ALSO pineapple juice to use for MALIBU AND PINEAPPLE!!! Yayyyy! I didn’t drink it with my carrot cake though, it was gone before the cake was even in the oven...

Love in Baking...Passionate Baker! 2:D


Thursday, 12 January 2012

Banana Bread

Banana Bread

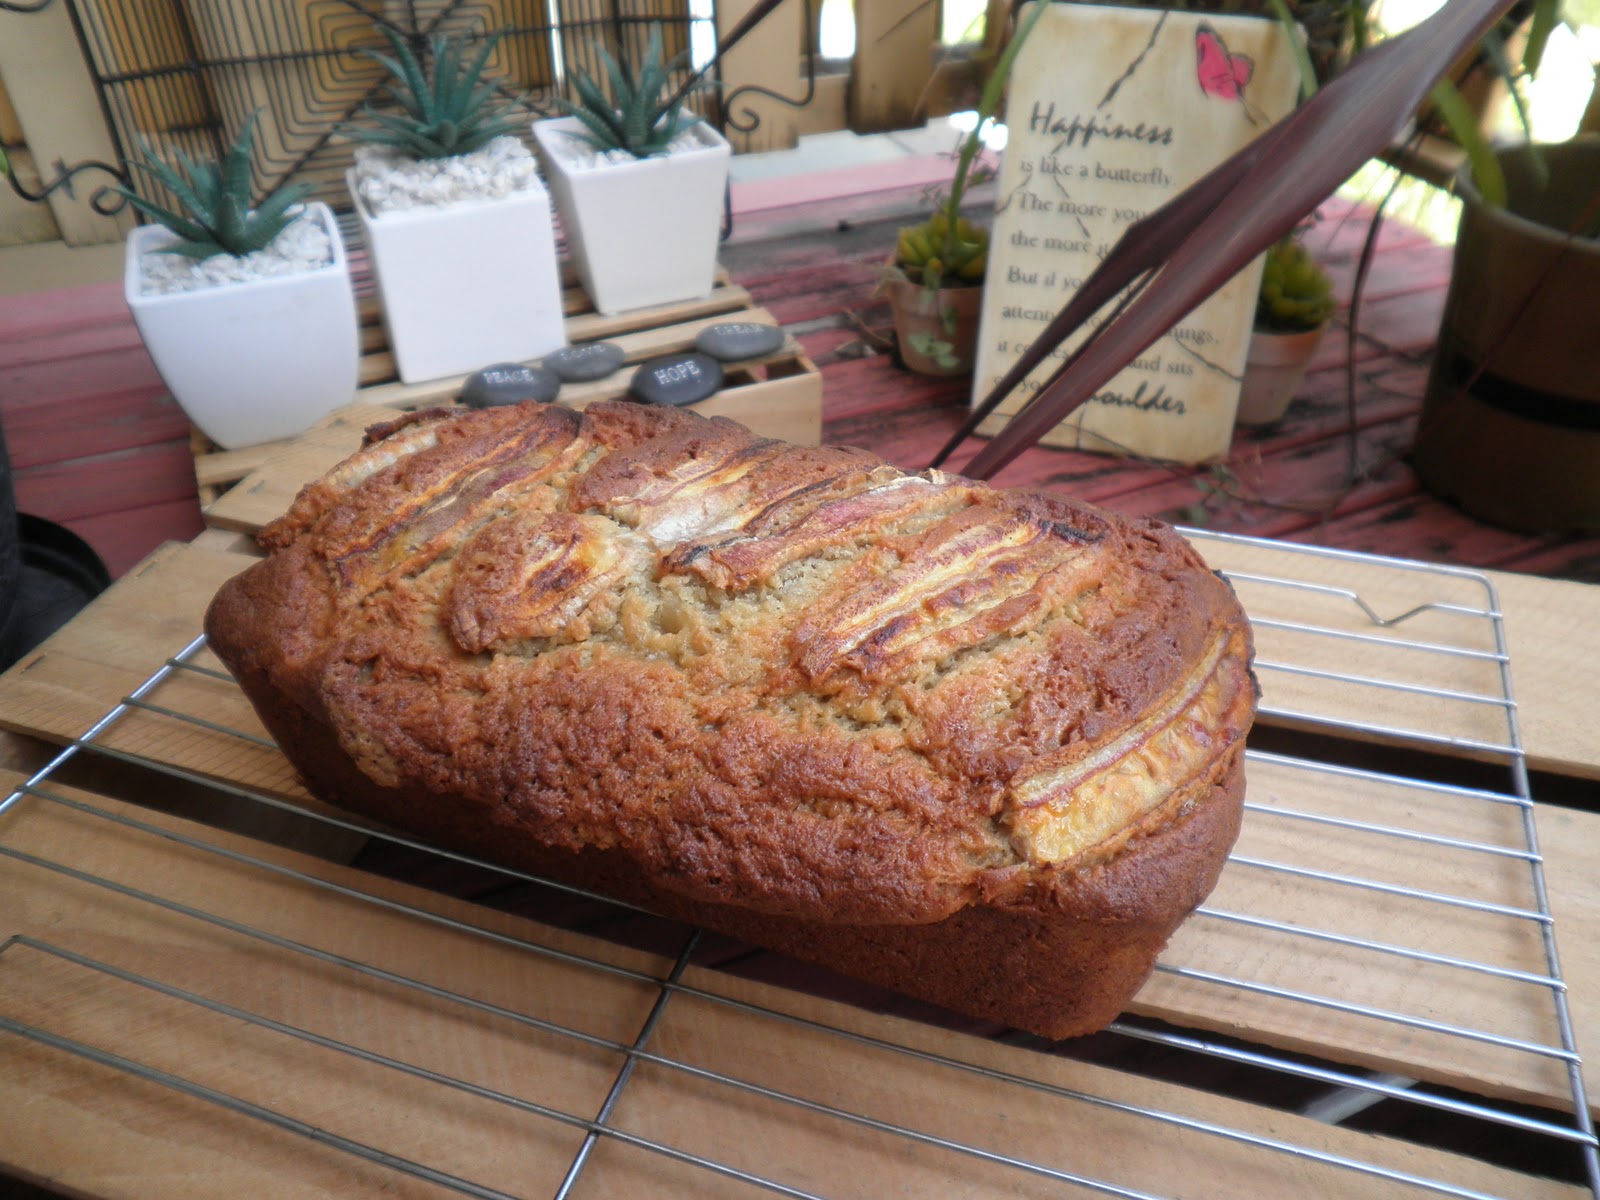
Ok, so usually if you have to play the ‘waiting game’ to make Banana Bread it’s because you’re waiting for the banana’s to get those little black spots that tell you their overripe.  However, when I made this loaf of banana bread my bananas were ready to go yesterday I had to wait till today before I could use them because I was on the Gold Coast all yesterday and last night!  Oh the torture!!! I think I may have even dreamt about banana bread last night...

So I got up at 6am and went straight down to the kitchen to use my bananas!  Would you believe my brother (who was asleep on the couch) actually slept through the mix master!!!! Wish I could do that...It was in the oven by 6.45 but because I like mine with extra banana, it took a little longer to cook than what I would have liked.  Worth the wait in the end though, the aromas filling the house and the intense banana scent when I took it out of the oven was just amazing.  You could smell it throughout the house (over 3 floors) and out the front in our courtyard!  I bet the neighbours hate me today...

It was pretty hard for me to restrain myself from gobbling up the whole thing right then and there, but fortunately the loaf is still in its entirety and I will wait till it cools and moistens up THEN slice off a huge piece and devour it!  I find if you leave banana bread to itself for a little the banana flavour comes out a little more and the whole loaf just have a stickier and moister feel to it, worth the wait!

Super Moist Banana Bread from Spark Recipes

1/2 cup (113g) butter, softened
1 1/4 cups castor sugar
2 Eggs
4 tbsp Sour Cream (can use yogurt as well)
1 1/2 cups plain flour
1 tsp baking soda
1 tsp vanilla extract
1 1/2 cups overripe bananas (3-4 small or 2-3 large)

Mixture
Method:

Line a 9" x 5" loaf pan with baking paper and spray with non-stick spray.  Then preheat the oven to 180⁰C.  Beat the butter and sugar together then add the eggs, mixing well after each addition.  Then add the sour cream, flour, baking soda, vanilla, and bananas and mix well.  Pour the mixture into the prepared tin.  If you have any left over bananas, slice one thinly top to bottom and lay the strips diagonally on top of the mixture.  Bake for about 50-60 minutes or until a skewer inserted into the middle comes out clean.  


Then...let it sit and cool off, get all moist and yummy and......ENJOY!

Love in Baking, Passionate Baker! 2:D

Monday, 9 January 2012

First Post--Red Velvet Cupcakes

-
Red Velvet Cupcakes
So I've been meaning to start a baking blog for so long, but have just never gotten around to it.  I've taken photos of majority of the things I've either baked or cooked in hope that I would one day eventually be motivated enough (or have the time to) start this blog.

My first Baking Post, being after Christmas and all, should rightfully be the baking goods I made for our families Christmas Eve Dinner.  I made Red Velvet Cupcakes, a cake I had never attempted but somehow managed to actually do right!

These cupcakes were to die for, adapted from Lick the Bowl Good's baking blog.  I omitted the pecans and layering of frosting and cake so that I could turn them into cupcakes for my Christmas Tree Cupcake Tower.

Red Velvet Cupcakes

Ingredients:


  • 2½ cups all purpose flour
  • ½ tsp salt
  • 1 tsp vanilla extract
  • 1 cup buttermilk
  • 2 tbsp cocoa powder
  • 2 tbsp red food colouring
  • 1 cup (227g) butter
  • 2 cups sugar
  • 2 eggs
  • 1½ tsp bicard soda*
  • 1 tbsp white vinegar
Method:


Preheat oven to 180⁰C.  Arrange cupcake cases in a 6 hole patty-cake/muffin pan, then spray lightly with non-stick spray.  I always do this to make sure you don't lose half your cupcake when you try to take the cases off.


This recipe requires three separate bowls, one small, one medium, and one large.  Combine the flour and salt together in the medium bowl.  Then in the small bowl  mix the cocoa and red food colouring together to make a dark red, almost brown, paste.

Then in the large bowl beat the butter on a low speed until it is creamy and soft.  Add the sugar and continue beating until the mixture becomes light and fluffy, this should only take a few minutes.  Gradually add the eggs, mixing well after each addition.  Once the mixture has a smooth and glossy look and is quite fluffy, you can add the red-cocoa paste.  Beat this in until the colour is evenly dispersed in the egg mixture.

Combine the vanilla and mix in a pouring jug.  Then add about a third of the flour mixture to the egg-cocoa past batter, followed by half the milk.  Beat with an electric mixer on a low speed, only enough to combine the ingredients.  Then add another third of the flour and the remaining milk.  Once you've mixed these in, add the remaining flour in the same way.

In a separate bowl combine the baking soda and the vinegar.  Then, using a wooden spoon quickly stir this mixture through the cake batter. Make sure you stir this through gently, this cake should never be over mixed so to ensure it remains light and fluffy.  

Once you have done this you can scrape the batter into the individual cupcake cases.  Fill each cupcake case just above half way.  Any less and they won't rise to the top of the cases.

Bake in the prepared oven for about 25 minutes, or until they spring back when touched.  The cupcakes should look glossy or sticky on top, this means they will be nice and fluffy on the inside.

Place them on a cooling rack and let cool completely before frosting them.

*Bicard soda and baking soda are terms used interchangeably, however they are different from baking powder.  Baking powder already has cream of tartar added to it, but in recipes such as this where vinegar is used, the necessary reaction to make the flour rise can be obtained using bicarb soda.

Cream Cheese Frosting, adapted from Lick the Bowl Good

  • 1 Cup butter, at room temperature
  • 250g Philadelphia cream cheese, softened
  • 2 tsp vanilla extract
  • 4 cups icing sugar (I used soft)
  • Lime food colouring
Gorgeous Red Inside
Using an electric mixer, beat the butter at medium speed until creamy. Add the cream cheese and beat until combined. Then add the vanilla extract and powdered sugar and beat at low speed, occasionally stopping to scrape the sides and bottom of the bowl, until light and fluffy.

As I was using my cupcakes for Christmas I wanted green frosting so I added around 9 drops of yellow food colouring and 3 drops of green food colouring to get a subtle green tinge to the frosting.

Icing the Cupcakes


To be honest, I rarely use frosting, I am more of a glace icing girl.  But this sort of recipe needed cream cheese frosting to make it so I thought I'd better try my hand at piping the frosting on.  I used a nozzle that had about 5 little tooth marks and just swirled the frosting on in zig zags.  Once I'd done that I sprinkled each cupcake with silver cachous (BEFORE the frosting set).  I had leftover frosting, and stored it in the fridge (it was then eaten at will!).


I then assembled the onto a Christmas Cupcake Tree (literally a Christmas Tree!).  The family loved it! =D  

The recipe may look a little bit nit-picky, but have a go, it was definately worth it! droooool....

Love in Baking, Passionate Baker! 2:D